Friday, 30 September 2011

Early Christmas tipple... an ideal distraction from snowy thoughts?

As perverse as it seems in this late summer sun I’m already in full Christmas preparation mode.  I can only explain it as a way of drowning the horrible niggle rattling away in the back of my head.  The niggle which tells me this winter I won’t be going out to spend 5 months up a mountain snowboarding my little heart out... again... THE SECOND YEAR IN A ROW!!  

It makes me sad to think about so I keep my mind elsewhere... Now that my holiday is out of the way Christmas at home with my family is the next big distraction – especially with the added bonus of an impending nephew! 

And so, just like last year (although somehow it's SOOO much worse) - Christmas is my get to point.  If I manage December without unintentionally smuggling myself aboard a bus full of departing seasonairres I'll be over the first hurdle.

This might just be the drink I toast myself with when I (fingers crossed) manage to make it through my friends’ en masse desertion – a tasty little beverage if ever there was one... unfortunately it’s mighty quaffable so won’t necessarily last the distance!

Zest the oranges in long wide strips using a potato peeler (ensuring no pith is attached).  Fill a large kilner jar with the zest, spices and vanilla pod then pour over the vodka.  Seal and leave to steep for a week, shaking the jar every day.
After a week of shaking, dissolve the sugar in 500ml boiling water.  Add to the vodka mix and then leave for another week, shaking the jar every day.

After this second week strain into bottles and discard the solids.  This is ideal for gifts – just drop some fresh peel and spices into the bottle before giving.

It will keep for 6 months.  Which coincidentally is long enough to keep me going until March when I'll be off visiting friends in La Plagne for (almost) the whole month...

1L vodka
5 large oranges, zest only
2-3 cardamom pods
1 vanilla pod
1 cinnamon stick
600g sugar
Extra oranges, cinnamon sticks, cardamom and vanilla pods for decoration once bottled.

Wednesday, 28 September 2011

Surf, sandy wetsuits, sunsets and seafood, seafood, seafood...

Well I know I promised in the last post that I wasn't going to gloat but what a holiday... I’ve still got the glow even though I flew home five days and was greeted back with grey skies, rain and 240 expectant emails.

I’d never been to Portugal before but think we unexpectedly hit the jackpot.  We were in a little town called Arrifana on the western coast of the Algarve.  It was tucked well away from the usual tourist honeypots with a harshly arid landscape, bright red soil and that amazing smell I always associate with hot climates; citrus, eucalyptus and pine. 
We were perfectly positioned – close enough to the beach to walk and with views of the glowing orange sunsets. 
Highlights for me were: the company of great friends; delicious food; surfing every day; my friend Nina's invention of "Mungo" (the worst cocktail EVER); spending the week with my friend’s young son referring to me as “Uncle Lindsay”; Dolly Parton impersonations (it was a drunken birthday – what else are you supposed to do with all those balloons?), Net-Spoon championships*... oh and did I mention the foooodddd... We had breakfasts in the sun after early surfs, long lazy lunches, and barbecued fresh fish every evening... Delicious!

*It would probably be best not to explain the wonder of Net-Spoon (I imagine some of the beauty will be lost in translation) but in case anyone is interested in this bizarre game it involves competing to throw the contents of the cutlery drawer into the pool cleaning net. 

Low points were restricted to (...and lets face it, it wasn't much of a low): getting one of the fins of my surfboard in the back of my head on day one.  I had to spend the rest of the day (unable to surf as no-one had ready access to some superglue to stick me back together) being mocked by my friends with a makeshift bandage made from a blue swab (donated by a very unsure looking lifeguard) and a spare pair of bikini bottoms...
Truly I can't believe how fast the week went - I could have spent months in the same routine and not got bored!

Once back, in a bid to keep my holiday feeling going for a bit longer I made these Portuguese style biscuits for my colleagues... I bought "The Gourmet Cookie Book" after reading this post and I'm SOOOO glad I did... these little loves are ridiculously easy to make:

Preheat the oven to 180˚C.  Mix the ground almonds, bread crumbs and sugar in a bowl.  Separate three of the eggs.  Whisk the egg whites until stiff and fold into the mixture.  Add the almond extract and mix.

Roll spoonfuls into small balls and place on a greased baking sheet.  Make an indentation in the top of each of the cookies. 
Beat together the egg yolks and the remaining whole egg.  Fill the hollows in the top of each biscuit with approximately half a teaspoon of beaten egg mixture.  Then top it off with a whole almond. 
Bake for approximately 15 minutes or until golden brown.

Almond Bolas (Portuguese Almond Cookies):
3 cups ground almonds
1 1/2 cups dry bread crumbs
1 1/2 cups sugar
4 eggs (3 separated, 1 whole)
1 1/2tsp almond extract
Whole almonds, enough to stud the top of each cookie

Wednesday, 21 September 2011

Holiday...

Currently I'm sunning myself on a beach... or surfing... or maybe wandering around a market full of yummy treats in the south-west corner of Portugal... here is my postcard to you all...


Weather's good, food's great, wish you were here...


:o)


x


I promise I'm not just gloating... no really!  I thought I'd also share Delia’s recipe for Irish Tea Bread which I made before setting off...

It's super tasty and that's coming from someone who doesn't like fruitcake!  It really can't be beaten when toasted and slathered in butter...

The day before you want to bake, dissolve the sugar in the hot tea, add the fruit and candied peel and leave overnight to plump up.

Pre-heat the oven to 170˚C.  Bake the nuts for 6-8 minutes then roughly chop once cooled.

Stir the egg mixture in to the soaked fruit.  Sift the flour in then stir in the nuts.

Divide the mixture between two lined loaf tins and bake for 75-90 minutes.  Immediately remove them from the tins and cool on a wire rack.

Irish Tea Bread: makes 2 small loaves 
225g raisins
225g currents
225g sultanas
110g candied peel, chopped
225g demerera sugar
275ml Earl Grey tea (or any fragrant tea), hot
90g hazelnuts
90g almonds
2 large eggs, lightly beaten with 4tbsp milk
450g self-raising flour

Wednesday, 14 September 2011

A pretty pickle...

As Carl Sandburg once said: “Life is like an onion: you peel it off one layer at a time, and sometimes you weep”...

...then again he also said “the moon is a friend for the lonesome to talk to” so possibly isn’t the most sane of people to listen to!  (No offence budding poets!)

Perhaps a more fitting phrase for me this week would be “Life is like a pickled onion: you pop one in your mouth and spend the next few moments in a rapture of gurning, vinegary, delight!”...

Yes, this week I have been pickling anything that has sat still on the counter top long enough to be thrown in vinegar.  A vat of pickled onions and more piccalilli than you could shake a stick at... which is apparently quite a lot!

Only three days left until my holiday to Portugal... goodbye preserving, HELLLOOOOOO sun, sand, swimming pools, sangria, surfing and Portuguese Custard Tarts! Ok, so the last one doesn’t start with S but it’s still pretty exciting!

Don't miss me too much...

Make brine by boiling one litre of water with the salt until dissolved.  Cool completely.  Peel the shallots, and submerge in the brine.  Leave for at least 24 hours.

Place the rest of the ingredients and two of the peeled shallots in a pan with an additional teaspoon of salt and two peeled shallots.  Bring to the boil and boil for five minutes.  Turn off the heat and leave to cool completely. 

Rinse the brine from the shallots and pack them into jars.  Pour over the cold vinegar, seal and store in a cool place.  Leave for at least a week before opening.


Place the vegetables in a colander over a bowl.  Sprinkle with salt and mix.  Cover with a tea towel and place in the fridge for 24 hours.  Rinse with cold water and leave in the colander to drain.

Blend the cornflour, turmeric, mustard, ginger, and seeds to a smooth paste with a small amount of vinegar.

Bring the rest of the vinegar to the boil with the sugar and honey.  Pour a little of the hot vinegar in the spice paste to loosen it up.  Then pour into the vinegar.  Bring back to the boil and stir until thickened to the consistency desired then turn off the heat.

Stir in the vegetables and pack into warm, sterilised jars.  Leave for 6 weeks before opening and use within the year.

1kg shallots
250g salt
1L malt vinegar
60g pickling spices (I used a mixture of whole coriander seeds, mustard seeds, chilli, peppercorns, bay leaves, all spice)
25g root ginger
1 small cinnamon stick

1kg assorted crunchy vegetables, chopped to bite-sized pieces (I used radish, courgette, cauliflower, cucumber, green beans, carrot, and onion)
50g salt
60g cornflour
20g turmeric
20g English mustard powder
20g ground ginger
1 tbsp mustard seeds
2tsp cumin seeds
2tsp coriander seeds
1L vinegar
100g sugar
300g honey

Friday, 9 September 2011

The taste of going back to school...

Thankfully, for me September is no longer the month for dreading going back to a world of uniforms, lessons, and homework.  Saying that, inspired by this season’s bountiful offering of plums galore, I was transported back to the first days of the new school year when I made this old family favourite: plum cake. 

It used to be the trade off for re-imposing the school routine... you go back to class, yes BUT, you get a slab of plum cake in your lunchbox!  It somehow manages to be everything at once; sweet, tart, moist, light and perfect for mid-morning or mid-afternoon sugar dips (or both if like me you’re a glutton!). 
I’m not even sure who the recipe originally came from.  I know it’s from my dad’s side, so definitely one of the German contingent. 

Saying that, it’s one of mum's favourite things – in fact it could quite possibly be the reason she married into such a crazy family.  Well maybe it’s not THAT perfect a recipe but a good rumour to start anyway! 

This year instead of that back to school feeling, September has become a month of looking forward to my late summer holiday to Portugal.  Only a week to go... WHOO HOO!!

Preheat the oven to 180˚C.  Cream together the butter and white sugars.  Beat in the eggs with a little of the flour.  Stir in the vanilla. 

Gradually stir in the remaining flour, adding the raising agent with the last spoonful.  Mix in the vanilla essence.  Add the milk a little at a time until the mixture has reached a soft cake consistency.

Spread the mixture over the lined tin/s.  This recipe is for two 7” and one 6½” sandwich tins.  I used a large square roasting tin because unlike my grandmother I don’t have large numbers of mismatched sandwich tins lying around. 

Push the plum halves gently into the cake mixture (skin side up).  Fleck the top of the fruit with butter to stop them drying out and sprinkle the whole cake with brown sugar.

Bake for about 50 minutes or until firm and golden.

This can also be made with apples instead of plums by peeling, coring and thinly slicing 900g cooking apples.  Arrange over the top of the cake, then sprinkle with sugar and cinnamon to taste.

Plum Cake: (makes 3 small cakes or one large tray bake)
125g butter, plus extra for dotting on the top
150g caster sugar
50g granulated sugar
3 eggs, lightly beaten
300g self-raising flour
1tsp vanilla essence
1tsp baking powder
milk
1 punnet of plums, cut in half with stone removed – I used 10 plums but you can use as many or few as you want
2tbsp brown sugar

Wednesday, 7 September 2011

The wanderer returns!

Horrah, my flatmate has returned!  I have just spent a little over a week living on my own.  Suddenly I’ve discovered (a) how little interest I have in cooking meals for one and (b) what an inordinate amount of extra time I have without a small, cheese-hating, reality TV addicted housemate on tap to entertain me.

In fact I can safely say I missed her this much...
There were chutneys, marmalades, jellies and jams coming out of my ears by the time she arrived back from her Croatian holiday. I was like a crazed preserve addict, only stopping when I ran out of jars... at which point I started making and freezing Christmas presents despite the fact that it's only just September! 

I made a rather nice apricot & vanilla jam – which left me with a supply of apricot kernels to be used for these little beauties!  So I’ve frozen the kernels and will be baking the Ricciarelli at a later date (read: when I can think of a viable excuse for consuming large quantities of soft almondy biscuits).

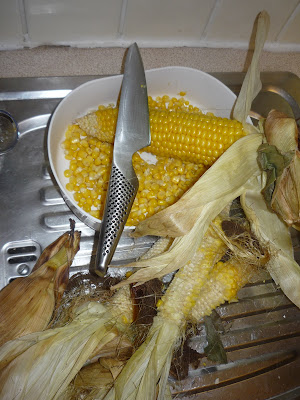
Anyhoo... one of the things I did to entertain myself (after my jar supply had run out) was pop home to visit my family.  Mum and Dad (as usual) loaded me down with veggies from their allotment.  I came home with armfuls of corn, four of which were baked into a roasted sweet corn and chilli cornbread... Delish! - Especially when still warm from the oven and so quick to make!  It'll be perfect comfort food teamed up with a bowl of soup on a blustery autumnal day.  The basic cornbread recipe was adapted from this book.

Preheat the oven to 180˚C.  Roast the corn cobs in their husks for 20-30 minutes until the kernels are sweet and tender. 
Remove from the oven and leave to cool slightly before cutting the kernels from the cobs.
Combine the flour, polenta, baking powder, salt and sugar.  Make a well in the centre and gently pour in the eggs, buttermilk and butter.  Mix until you have a smooth batter. 

Stir in the sweet corn kernels and chilli.  Pour the batter into a greased 20cm square cake tin.  I used a bigger tin which resulted in a very sad, thin loaf - next time I'm sticking to the correct tin! 

Sprinkle the top with Malden salt.  Bake for 25-30 minutes until lightly golden and firm.  Allow to cool slightly in the tin then turn out and cut to small squares.  Serve warm.

Basic Cornbread:
150g plain flour
150g polenta flour
4tsp baking powder
½tsp salt
50g caster sugar
2 eggs, lightly beaten
250ml full-fat milk
2tbsp butter, melted
large pinch of Maldon salt

Additions for Roasted Corn and Chilli Cornbread:
4 sweet corn cobs, kernels only
1tsp dried red chilli flakes

Monday, 5 September 2011

New York chocolate cheesecake... at least I think that’s what it means?

I had some friends over last week.  The last time they’d been round I’d served them an incredibly disappointing almond, sultana and sherry torte with some vanilla buttermilk ice cream.  The torte was bland, the ice cream solid.  In fact the ice cream was so solid it was served in bricks and could have been put to better use by aspiring shot-putters loitering around the Olympic training grounds!

Anyway I quite wanted to offer something a little more appetising this time... (enter stage left:) a recipe which my uncle very kindly sent me from Germany.  It was for a New York chocolate cheesecake.  Apparently when my aunt made it for their friends it was a show stopper... I was sold!  I absolutely adore cheesecake!!

The recipe arrived and was translated with the help of some pidgin-Austrian I picked up the winter I worked in St Anton and a very dubious translation website...  I’m sorry, it’s telling me to do what with the what?!”  I have to admit, although something will have been lost in translation - oh my, was it tasty!


We had a competition to see who could get a photo of the prettiest slice to put on here... unfortunately we weren't overly successful.  The first slice somehow arrived on the plate without any biscuit attached in a miscommunication regarding which base  shouldn't be hacked through: cheesecake or cake tin.  Needless to say, despite all the yelling ("mind the base... mind the BASE!"), given that we were slicing with a carving knife, the cake tin is no longer non-stick! 

The second slice started off well but in the midst of a fit of over-the-top gloating it ended up upside-down... by the time we'd (finally) got a picturesque slice (three-quarters of a cheesecake later) I was laughing so much any photos I took were blurred into obscurity! 

Note to self: must take photos before getting stuck into the wine!


Preheat the oven to 175˚C.  Line the base of a spring-form cake tin with baking parchment. 

Melt the butter and crush the biscuits.  Mix together the crumbs, butter and cocoa.  Press the mixture into an even layer covering the base of the tin.  Bake in the oven for 10 minutes.  Remove from the oven and leave to cool at room temperature while you make the topping.

Gently melt the white chocolate with the crème fraiche.  I used short bursts in the microwave but a bain marie would also work.  Beat together the cream cheese, vanilla sugar and icing sugar.  Spoon in the melted white chocolate mixture and gently stir to combine but making sure not to over-mix!

Spoon the creamy chocolate mixture over the base.  Then chill for at least 6 hours so that it solidifies.

Run a knife around the edges before loosening the spring-form tin and serve covered with grated chocolate.  Berries make a good accompaniment to cut through the richness... and boy is this rich!

New York Chocolate Cheesecake: serves 10
200g ginger snap biscuits
100g butter
2tbsp cocoa
200g white chocolate
100g crème fraiche
600g cream cheese
2tbsp vanilla sugar
100g icing sugar
50g white chocolate, grated for decoration


Friday, 2 September 2011

Names for the Nephew...

There have been many discussions recently over names for the incoming nephew – so far the parents-in-waiting haven’t been impressed with any of my suggestions: Mungo Duncan; Duncan Duncan; Dougal Duncan; Fergal Duncan; McDuff Duncan... Apparently any of them would constitute a reportable offence in cruelty to children. 

Currently the unsung champion name which (surprisingly) both my brother and I are really pushing for has to be - Bodie “Dude” Keanu Duncan... Inspired!  For some reason the sister-in-law doesn’t seem that keen... maybe I should ease her into it with a Point Break themed evening?

Anyway, on a more food related point – I think I have discovered THE best red onion chutney recipe ever made... In fact I’m so in love with it at the moment, I’d be happy to name my soon-to-be-nephew “Fraser Doherty’s Caremalised Red Onion Chutney Duncan”!  It’s got just the right balance of sweet vs. tart (the chutney that is, not the name)! 

I’m about to spend my weekend making a second more substantial batch to last me through until Christmas because it will not only work with (soggy) end of summer bbqs, but also autumnal sausage sandwiches, ANYTHING with goats cheese or cheddar, chicken liver pate... you name it: I’m happy to try slapping some of this on!  I even added a spoonful to some vinaigrette the other day which was delicious. 

I’m sure it would work using any of the woody herbs to suit your taste: thyme, rosemary, sage...  Looks like it’s time for some experimentation!

We had this last night with a waitrose recipe for chicken liver pate and granary rolls - an unbeatable combination!

Sterilise your jars (pop them through a hot wash in your dishwasher and make sure you don’t open the door until you’re ready to jar up).

Finely slice the onions and chili into short, thin slices.  Cook them in oil in a frying pan with the bay over a low heat for 20 minutes (until dark and sticky).
Next add the sugar and both vinegars and simmer until it becomes thick and dark.  This should take approximately half an hour.

Spoon the chutney into the freshly sterilized jars.  You should leave them for at least a month for the flavors to fully develop but if you eat it straight away it’s still delicious!

Fry the livers in oil over a medium heat (stirring frequently) for about 10 minutes until cooked through.  Pop them in a blender and the pan and any juices back on the heat.

Add the chopped shallot, crushed garlic and thyme leaves to the pan and cook for a further couple of minutes.  Add the sherry and simmer for 30 seconds.  Scrape the contents of the pan into the blender bowl with the liver.

Add 100g butter and the orange juice and season.  Blend until a smooth paste.  Spoon the mixture into your chosen dish – individual ramekins, half-litre kilner jar, serving bowl etc. and allow to cool to room temperature.

Clarify the final 50g butter in a small pan.  This means melt it then remove from the heat and allow the white residue to settle at the bottom – this is the same process as making ghee.  Spoon the clear clarified butter over the top of the pate (to seal it) then sprinkle with Malden salt and chill until set.

Take the pate out of the fridge 15 minutes before serving.  Serve with the best red onion chutney in the world and some crusty bread.

Fraser Doherty’s Caremalised Red Onion Chutney: makes 2 jars (depending on jar size that is!)
8 red onions
1 red chilli
25ml olive oil
200g brown sugar
150ml balsamic vinegar
150ml red wine vinegar

400g chicken livers
Olive oil
1 shallot, finely chopped
1 clove garlic, crushed
1tsp thyme leaves (fresh or dried)
2tbsp sherry
150g butter, softened
1 orange, juice only